
Trendy DIY Party Water Bottle and Drink Pouch Labels | DIY Party Decorations
- Cass
- Feb 2, 2023
- 2 min read
Updated: Feb 8, 2023

These party supplies are so fun to have for an event. These were created with other party supplies for my daughters first birthday. These party supplies also double for cute decor to display for your event. You can also give these out as party favors. Follow below for more details on everything was made.
Materials: (Affiliate Links)
Hot Glue Gun and Glue Sticks
Custom Party Water Bottle Labels

Step 1: Upload your designed image as a "complex image" in Cricut Design Space.

Step 2: Duplicate the image to fit as many as you can one sheet of paper.

Step 3: Print then cut the image and send the image to the ink jet printer first.

Step 4: Retrieve the printed image from the ink jet printer. Select the appropriate materials option. (I selected photo paper for these water bottler labels).
Step 5: Attach to the Cricut mat and load the materials.

Step 6: Remove the label from your existing water bottles.

Step 7: Remove the label from the Cricut mat.

Step 8: Wrap the label around the water bottle and adhere the ends with glue.

Custom Capri Suns

Step 1: Start with uploading the image that you want to use in Cricut Design Space.

Step 2: Again, duplicate the image to fit as many as you can one sheet of paper.

Step 3: Send the image to the ink jet printer first.

Step 4: Feed the printed ink jet image into the Cricut by loading it onto the mat and selected the best fit cutting material.
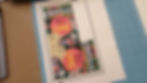
Step 5: Peel the cut paper off the Cricut mat.

Step 6: Gently remove the attached straw from the front of the Capri Sun packaging.

Step 7: Use a hole puncher to punch a hole where the hole is on the Capri Sun.
Step 8: Stick the label on the front of the Capri Sun covering the existing packaging image.


Let the party begin! Lay out these custom packaged drinks for display at your next event. Try it out! Come say hi and tag me @Craftingwithcass on Instagram if you decide to create your own! Subscribe to the blog for everything DIY and NEW updates!
Find more DIY party here on the blog!
Watch the video for more! Take a quick look of the before and after with short DIYs on Facebook!
Affiliate links have been used in this post.