
The Best New Upgraded Modern Dollar Tree Decor for Cheap that Looks Stunning
- Cass

- Sep 16, 2024
- 3 min read
Updated: Dec 11, 2024

It’s planter season and I’m crafting up some stylish planters! I’m giving a drastic upgrade to Dollar Tree planter pots! I’m flipping these basic pots for $1.25 and making them look a lot more expensive!! These planters have texture and a high end look. I used different techniques and materials to have a variety of styles to fit with any home decor. Find out how each of these basic planters are upgraded below!
This post may contain affiliate links.
Faux Black Terrazzo Planter
Materials:
Paper
Paint Brush
Planter Pot
White Chalk/Acrylic Paint
Faux Succulents
Scrap Cardboard
Faux Moss
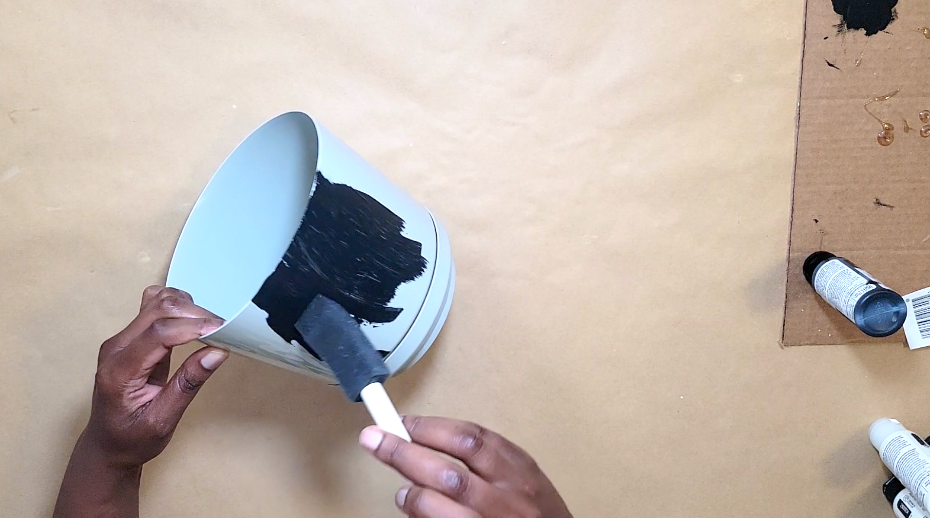
Step 1: Paint the outside of a basic planter pot using black chalk paint.

Step 2: Cut small shapes out of white paper.

Step 3: Use Mod Podge to adhere the cut out pieces to the outside of the pot.

Step 4: Dip a paint brush in white paint to add a lot of white dots randomly to the outside of the pot.

Step 5: Use scrap materials or cardboard to fill the top area of the planter.
Step 6: Poke a hole in the cardboard and add a faux succulent.

Step 7: Use a hot glue gun to adhere faux moss to cover the cardboard insert.

Splatter Paint Planter
Materials:
Paint Brush
Chalk Paint
Basic Planter
Faux Succulent or Plant

Step 1: Paint the outside of the planter pot with a couple coats of white chalk paint. Allow the paint to dry.

Step 2: Mix water and black acrylic paint.
Step 3: Dip a paint brush into the mixed paint. Splatter the paint on all sides of the pot.

Step 4: Use scrap materials to fill the inside of the plant and add a faux plant.

Faux Clay Texture Planter
Materials:
Basic Planter
White Chalk Paint
Paint Brush

Step 1: Brush on white chalk paint horizontally along the outside of the pot.

Step 2: Brush on some additional coats of paint for more coverage.

Step 3: Smear and layer on some spackle for some additional texture.

Yarn Planter
Materials:
Yarn
Basic Planter Pot
Hot Glue Gun and Glue Sticks

Step 1: Gather colorful yarn and a basic planter pot.

Step 2: Adhere and wrap yarn starting at the base of pot using hot glue.
Step 3: Continue to wrap yarn from the base of the pot to the top. Make sure the pot is completely covered in yarn.

Step 4: Adhere some lines of black yarn to the outside for some added contrast to other colors of yarn.
Step 5: Insert some filler and a faux plant inside.

Now you have a collection of fashionable planter pots to set for display. What do you think? Comment and come say hi. Tag me @Craftingwithcass on Instagram if you decide to create your own! Subscribe to the blog for everything DIY and NEW updates!
Watch the full video for more details! Watch short DIYs on Facebook!
Check out more here on the blog!


fantastic idea and work, looks great, we could use these tips😍