The Best New DIY High End Chic Ornaments For Cheap
- Cass

- Nov 27, 2023
- 2 min read
Updated: Dec 18, 2023

Today I'm sharing some techniques to create some custom and expensive looking ornaments. These ornaments are perfect for gifting or displaying on your tree. I'm using glass ornaments to create some etched monogram and mixed mercury metallic ornaments. I can definitely see gifting the monogram ornaments to someone hosting for the holidays as a nice personalized unexpected present. Keep scrolling to find out how I achieved this look!
This post may contain affiliate links
Etched Monogram Ornaments
Materials:
Flat Glass Ornaments
Velvet Ribbon
Adhesive Letter Stencils
Paint Brush

Step 1: Gather the materials.

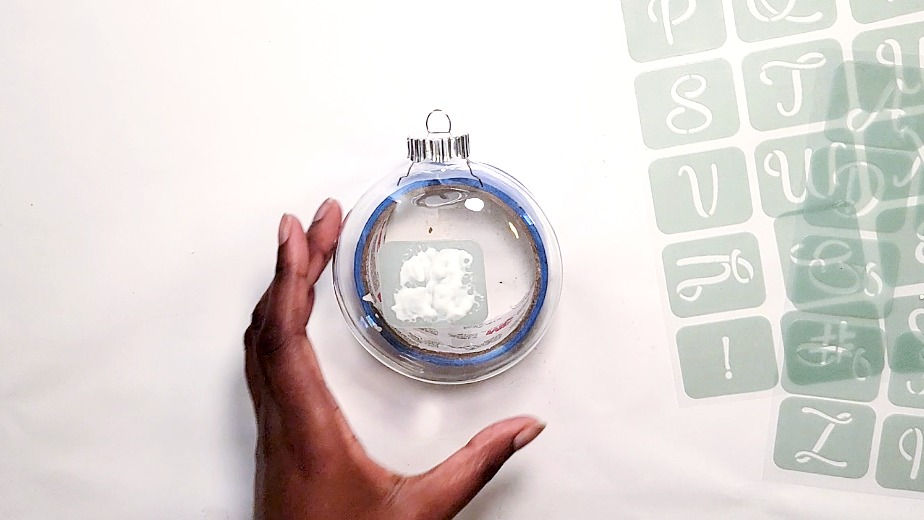
Step 2: Grab a clear glass ornament and place an adhesive stencil in the center of the ornament.

Step 3: Use a paint brush to tap on a thick layer of etching cream on the stencil. Allow the etching cream time to set. I just mainly followed the directions outlined on the etching bottle.

Step 4: Rinse off the etching cream.

Step 5: Reach for a velvet ribbon and cut the desired length for the hook of the ornament.

Step 6: Tie a knot at the ends of the folded cut ribbon.


Mercury Metallic Ornaments
Materials:
Gold Metallic Spray Paint
Vinegar
Glass Ornaments

Step 1: Prop up the ornaments and spray on metallic spray paint.

Step 2: Spray on gold, silver and rose gold spray paint on the entire glass ornament.

Step 3: Spray some vinegar onto the metallic color.
Step 4: Allow the ornaments to dry.


I love how each of the mixed metallic ornaments have a unique look. I really like the modern simplicity of the etched monogram ornaments. I have to figure out a way to make the etching effect look more noticeable. Could you see these on your tree or giving them away as gifts?
Comment and come say hi. Tag me @Craftingwithcass on Instagram if you decide to create your own! Subscribe to the blog for everything DIY and NEW updates!
Watch the video for more details on these projects! Take a look at Facebook for short diys.
See more chic DIY crafts and posts here on the blog!
This post may contain affiliate links


Comments