
Dollar Store DIY High End Christmas Decor | Luxe Cabin Vibes Decor
- Cass

- Dec 19, 2021
- 3 min read

I'm feeling all the cozy vibes with this set of luxe DIY's created using dollar store materials. I'm creating matching plaid/buffalo print pieces to add some high end Christmas decor to any space. These plush decorative throw pillows are adorable and filled with cotton balls. I think that the cotton balls are a great accessible and affordable substitute pillow filler. I love the fact that the pillows are no sew and don't require a lot of hassle to create. The believe Christmas table decor is a cute option to display on a coffee table or mantle for the holidays. Keep reading to see how I created luxe cabin vibes Christmas decor!
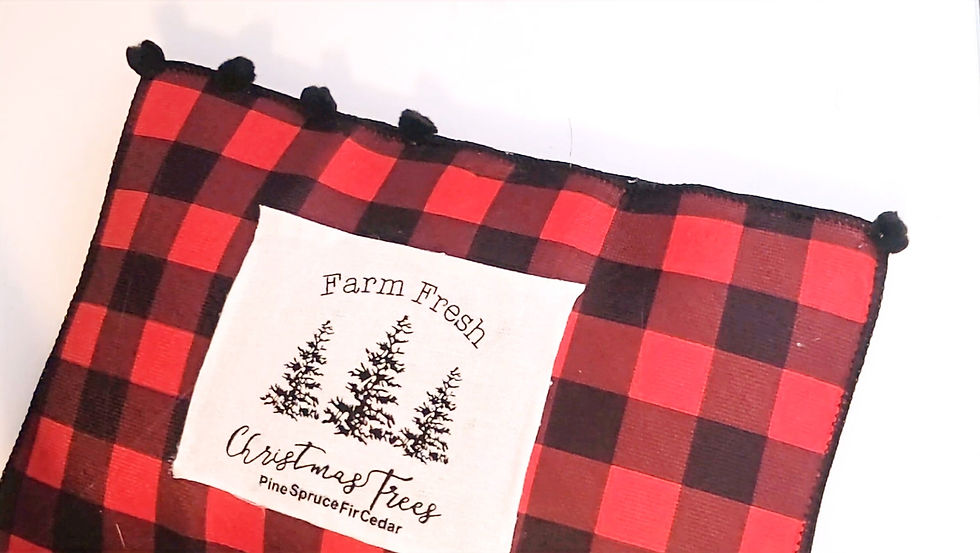
#1. Red Plaid/Buffalo Check Decorative Christmas Throw Pillows
Materials: (what I used to make two pillows)
4 Printed Dish Drying Mats
2 Mini Printed Tree Skirts
Cotton Balls
Hot Glue Gun and Glue Sticks
Craft Pom Poms (Optional)
Directions:
Cut the mini tree skirt so that only the printed area is cut in a square shape. Tip: Make sure to leave as much as you can around the perimeter of the print, to fold the ends over for a seamless look.
Use a hot glue gun to fold over the edges of the print to not show any rough edges.
Adhere the print to the center of the face of one of the dish drying mats.
Grab another plaid printed dish drying mat and glue it to the other mat with the tree print. Glue only three sides.
Fill the only open side with cotton balls.
Glue the side closed once filled with desired amount of cotton balls.
Then, add craft pom poms around the perimeter of the throw pillow.
Complete these steps for another throw pillow to complete the set. (I added pom poms around the entire perimeter of one pillow, and only the top and bottom of the other one).


#2 Believe Scenic Table Decor
Materials: (What I Used)
Plaid Print Stocking
2 Believe Shadow Boxes
Hot Glue Gun and Glue Sticks
Foam Bead Snow
Christmas Trees
Wood Game Blocks
Scrap Card Board
Scrap Styrofoam
Directions:
Start by demo'ing the back of the believe shadow box sign.
Cut the plaid print stocking so that it can cover the entire print that already comes with the shadow box. (I cover the existing pattern so that it can match with the rest of the Christmas decor).
Use a hot glue gun to adhere adhere the cut piece of stocking to the back of the shadow box.
Adhere and attach the back of the shadow box to the original piece.
Complete this same process for the other believe shadow box. (I used the other side of the stocking for the other box. The back of the stocking is a solid color so it makes the decor a cool reversible piece).
Stack and adhere wood game block pieces vertically on the sides to connect all the pieces to make one unified piece.
Measure to cut a cardboard base for the bottom.
Measure and cut styrofoam to fit the top open space.
Adhere Christmas trees to the styrofoam.
Add Mod Podge to open areas of styrofoam.
Then, pour foam snow to adhere on the Mod Podge.


That's it! This decor looks expensive and it didn't cost a lot to make. Which one is your favorite? Come say hey and tag me @Craftingwithcass on Instagram if you decide to create your own! Get a sneak peek of some of the upcoming DIY's with short videos @Craftingwithcass on Facebook.
Watch the video for more!
Affiliate links have been used in this post.


Comments